
Upgrading a Proxmox cluster has always followed a clear and reliable pattern:
first bring Ceph to the correct major release on all nodes, and only then perform the operating system and Proxmox upgrade node by node.
Sticking to this established order ensures a stable and predictable cluster migration.
This guide walks you through the traditional, proven workflow from Proxmox VE 8.x to 9.x, including upgrading Ceph from Reef to Squid.
Legend
- Preparation
- Upgrade Ceph on All Nodes (Reef → Squid)
- Proxmox Pre-Upgrade Check (Node by Node)
- Update Debian and Proxmox Repositories (Node by Node)
- Perform the Upgrade (Node by Node)
- Remove Noout (once for the cluster
Preparation
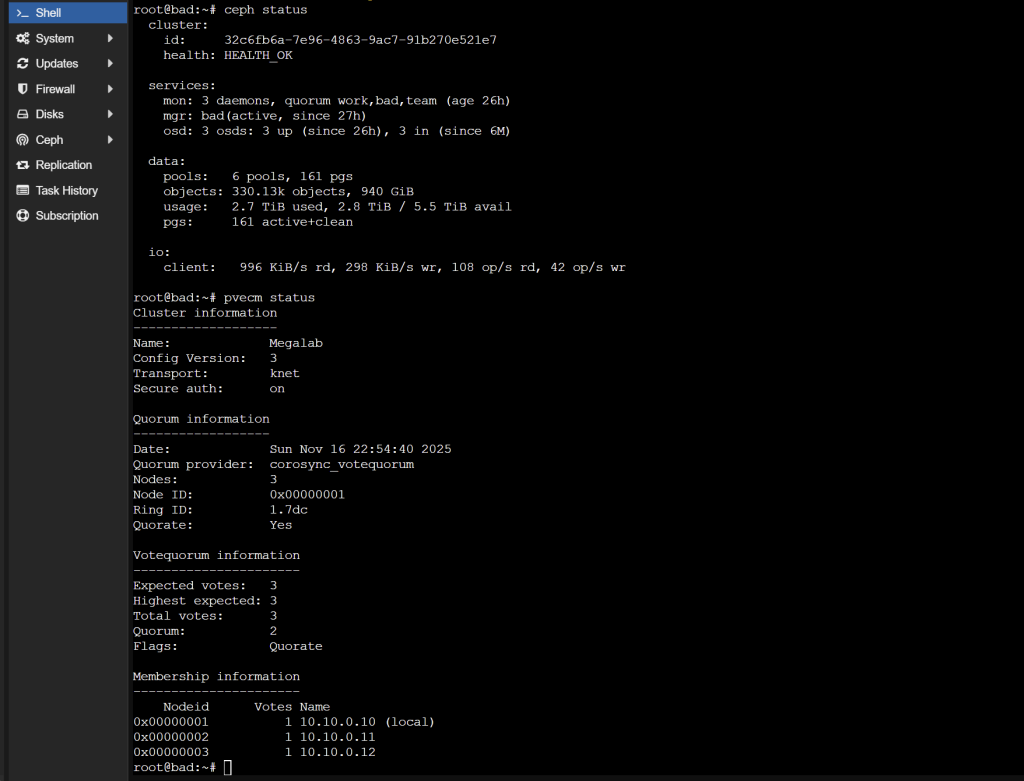
Before touching anything, make sure the cluster is healthy:
ceph status
pvecm status
There should be no degraded OSDs, no misplaced PGs, and no quorum issues.
Upgrade Ceph on All Nodes (Reef → Squid)
This part must be done on every node, one after another, until the entire Ceph cluster runs Squid.
Only after all nodes are complete should the Proxmox upgrade begin.
Update the Ceph Repository
On each node:
sed -i 's/reef/squid/' /etc/apt/sources.list.d/ceph.listSet the Noout Flag (once for the cluster)
This prevents unnecessary rebalancing during the upgrade.
ceph osd set nooutUpdate Packages
apt update
apt upgrade
Restart Ceph Services
systemctl restart ceph-mon.target
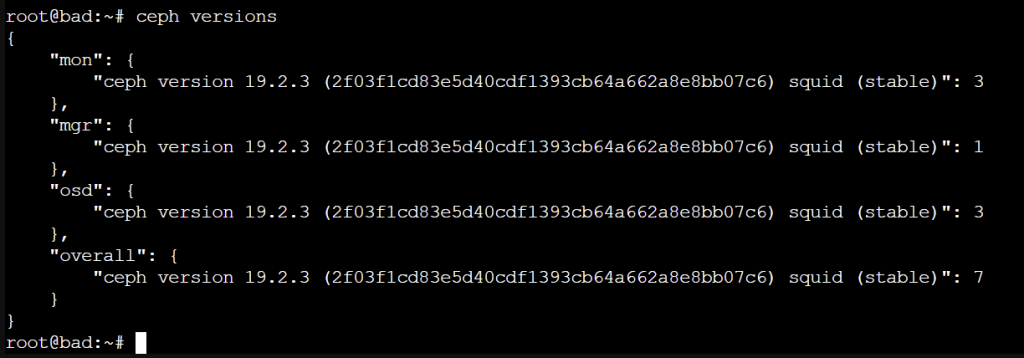
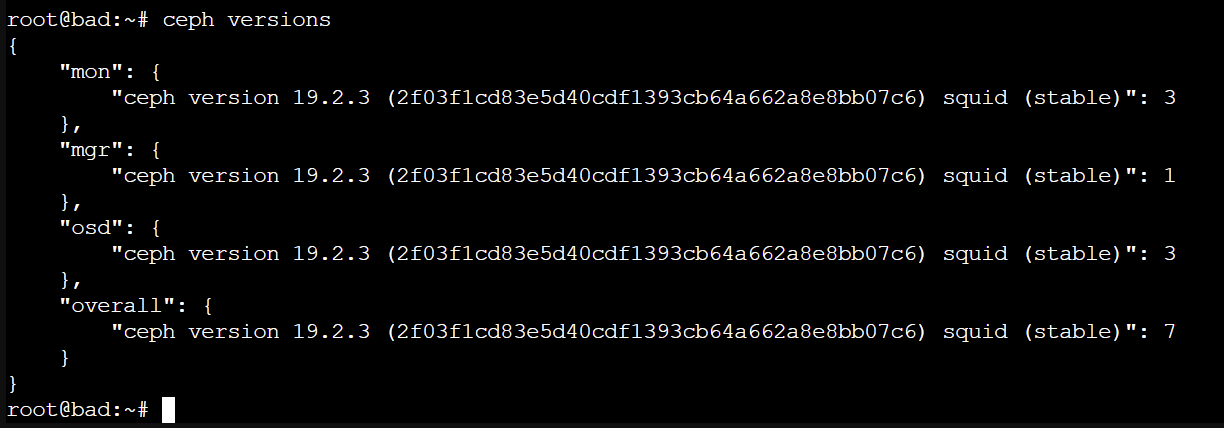
systemctl restart ceph-mgr.targetCheck Versions
ceph -s
ceph versions
Reboot the Node
A reboot is strongly recommended after a Ceph major upgrade:
rebootRepeat all steps above on every node.
When All Nodes Are Finished → Set the Ceph Release
ceph osd require-osd-release squidCheck again:
ceph status
ceph health
At this point, Ceph is fully upgraded cluster-wide.
Proxmox Pre-Upgrade Check (Node by Node)
Now the Proxmox upgrade begins — but again one node at a time.
Run on each node:
pve8to9 --fullAny warnings should be corrected before proceeding.
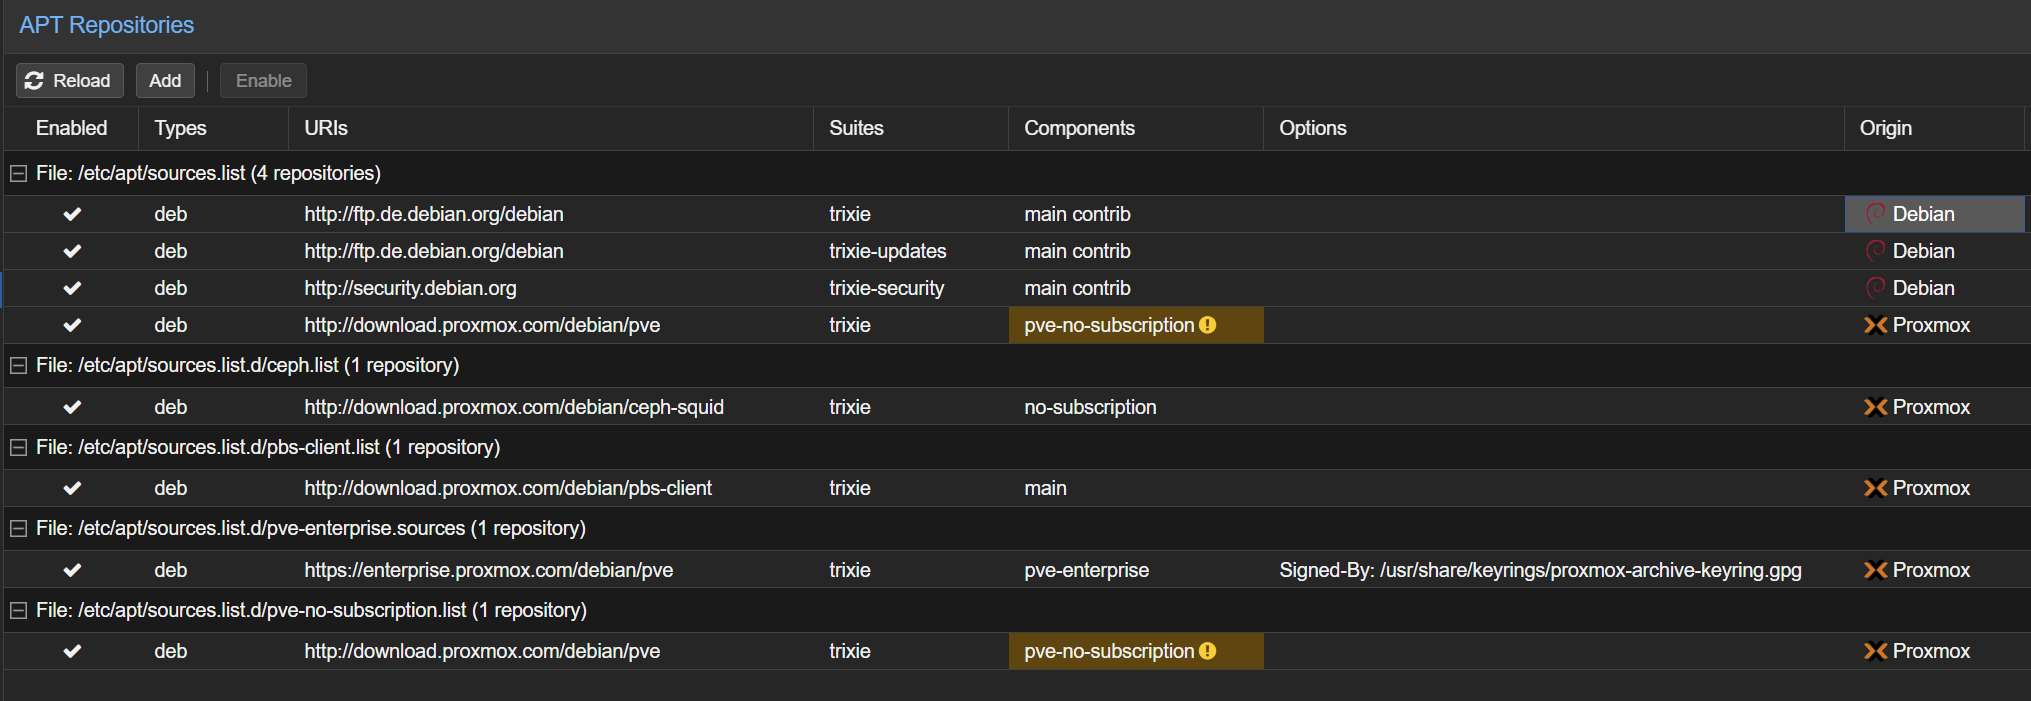
Update Debian and Proxmox Repositories (Node by Node)
Proxmox VE 9.x is based on Debian 13 Trixie, so the repository entries must be updated from bookworm to trixie.
Keep in mind:
Every system may contain different repository files.
You must update only the files that actually exist on your node.
General Rule
For any repository file that still contains bookworm, update it using this pattern:
sed -i 's/bookworm/trixie/g' /etc/apt/sources.list.d/<your-file>.listIn the Proxmox Web UI under:
Node → Updates → Repositories
Every entry must show trixie under the Suites column

Example for the main Debian sources
sed -i 's/bookworm/trixie/g' /etc/apt/sources.listExample for typical Proxmox repository files
sed -i 's/bookworm/trixie/g' /etc/apt/sources.list.d/pve-no-subscription.list
sed -i 's/bookworm/trixie/g' /etc/apt/sources.list.d/pve-enterprise.list
sed -i 's/bookworm/trixie/g' /etc/apt/sources.list.d/pvetest-for-beta.list
sed -i 's/bookworm/trixie/g' /etc/apt/sources.list.d/pve-install-repo.list
Example for PBS Client (if installed)
sed -i 's/bookworm/trixie/g' /etc/apt/sources.list.d/ceph.listPBS Client Repository (if present)
sed -i 's/bookworm/trixie/g' /etc/apt/sources.list.d/pbs-client.listPerform the Upgrade (Node by Node)
After updating the sources, perform the actual OS upgrade:
apt update
apt dist-upgrade
reboot
When the node is back online, verify:
pveversion -v
ceph status
Only after the current node is successfully upgraded and healthy should the next node be processed.
Remove Noout (once for the cluster)
Once all nodes have been upgraded and the cluster is stable again:
ceph osd unset nooutThe Ceph cluster will now resume normal behavior.


Leave a Reply