
Over the past few weeks, I came across several YouTube videos showing how n8n can be used as a small but powerful helper inside a homelab environment. After watching a few of them, I couldn’t resist the urge to build my own agent.
Shout-out to @NetworkChuck
What my agent already handles
- Monitor the overall health of my Homelab infrastructure
- Troubleshoot issues in Docker or LXC
- Start and stop VMs, LXC containers, or Docker containers
- Inspect and analyze log files
What I’m currently working on
- A dedicated tool for Wazuh access
- A Unifi integration (though Unifi still limits access to read-only)
- A Proxmox Backup Server access
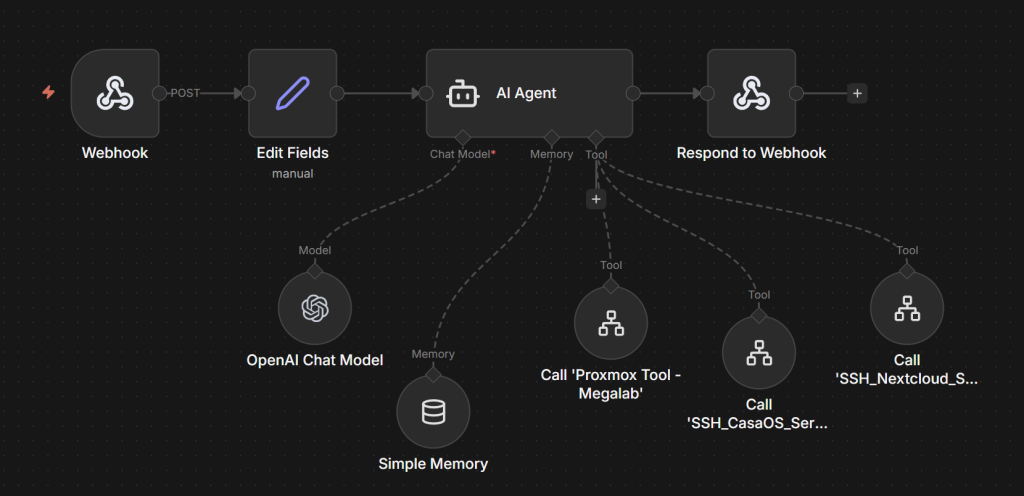
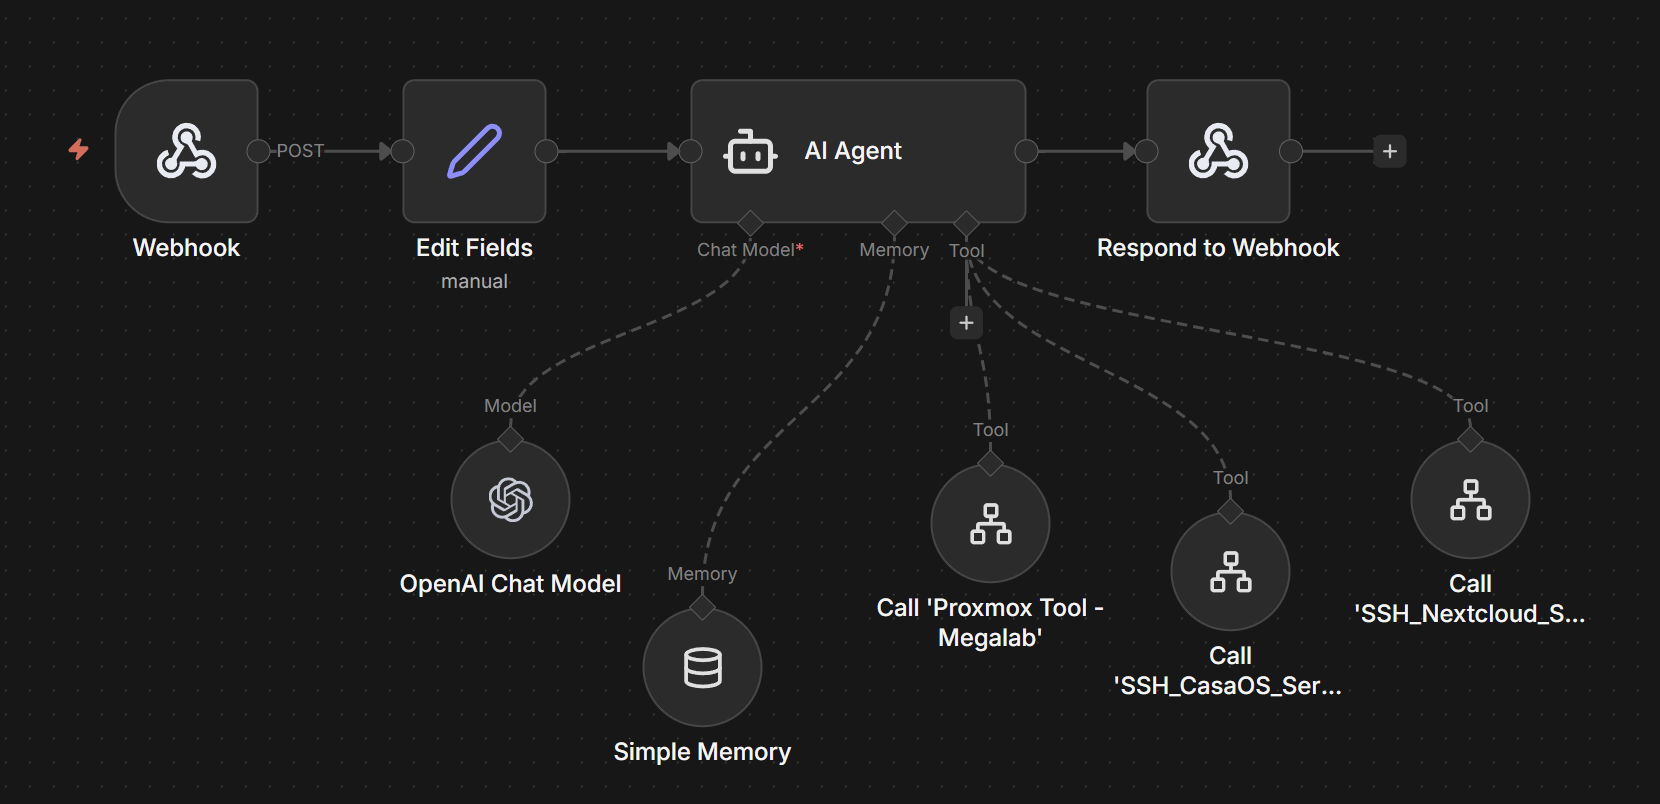
My current core nodes of the agent
- Webhook the entry point for external triggers
- Field editing for dynamic input and configuration
- AI Agent the heart of the system
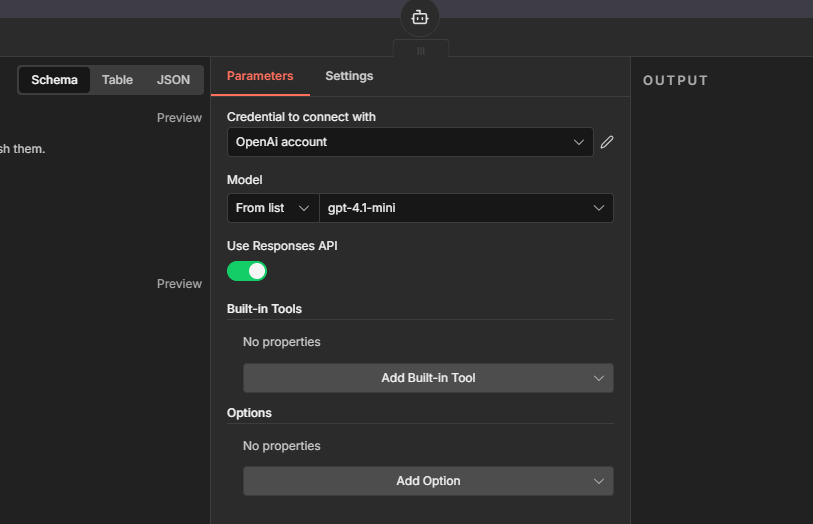
- OpenAI Chat Model (or any preferred model)
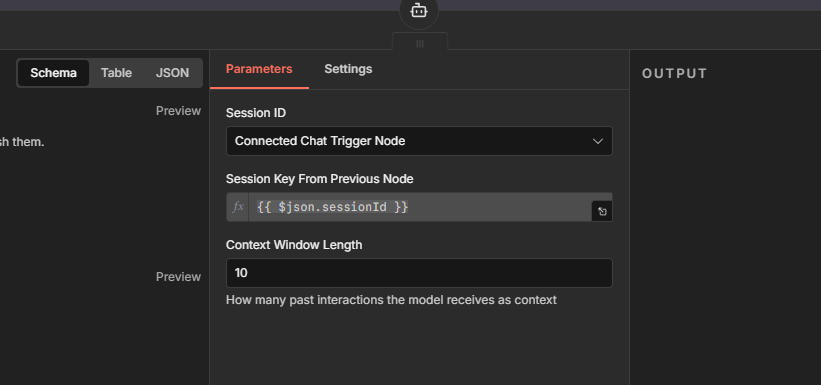
- Simple memory layer to maintain context across actions
- Webhook responses
- Various Tools each tool serves a specific purpose, such as SSH utilities or API-based functions
Step-by-Step Guide
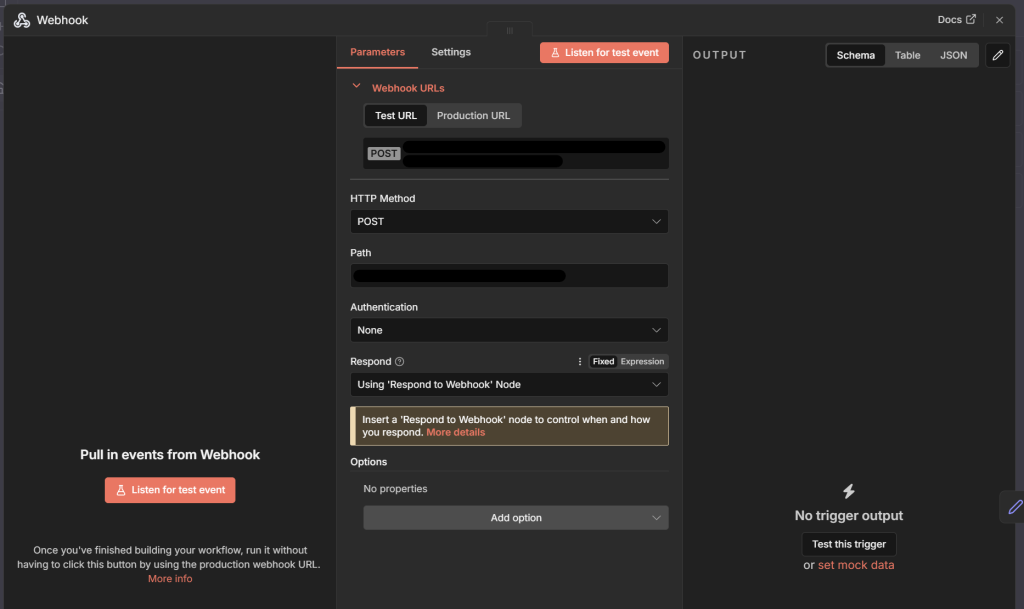
We begin with the Webhook node — the entry point of the entire agent. Every command sent from the Web-GUI arrives here first. Make sure the HTTP method is set to POST, since this allows you to send structured data such as JSON. In my setup, authentication is disabled because my instance is already protected behind Cloudflare. If you do not use a similar layer, enabling authentication here is strongly recommended.
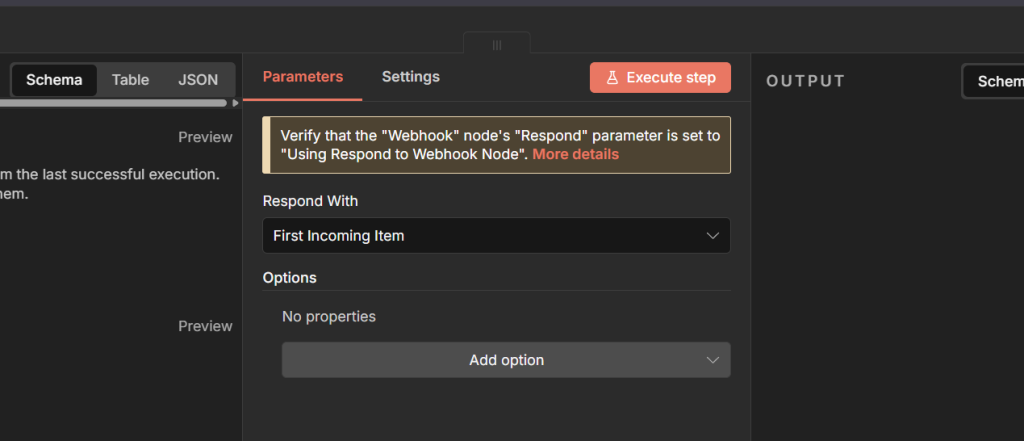
Finally, set Respond to “Using ‘Respond to Webhook’ Node”. This ensures the workflow replies only after all processing steps are complete and the final answer has been generated.
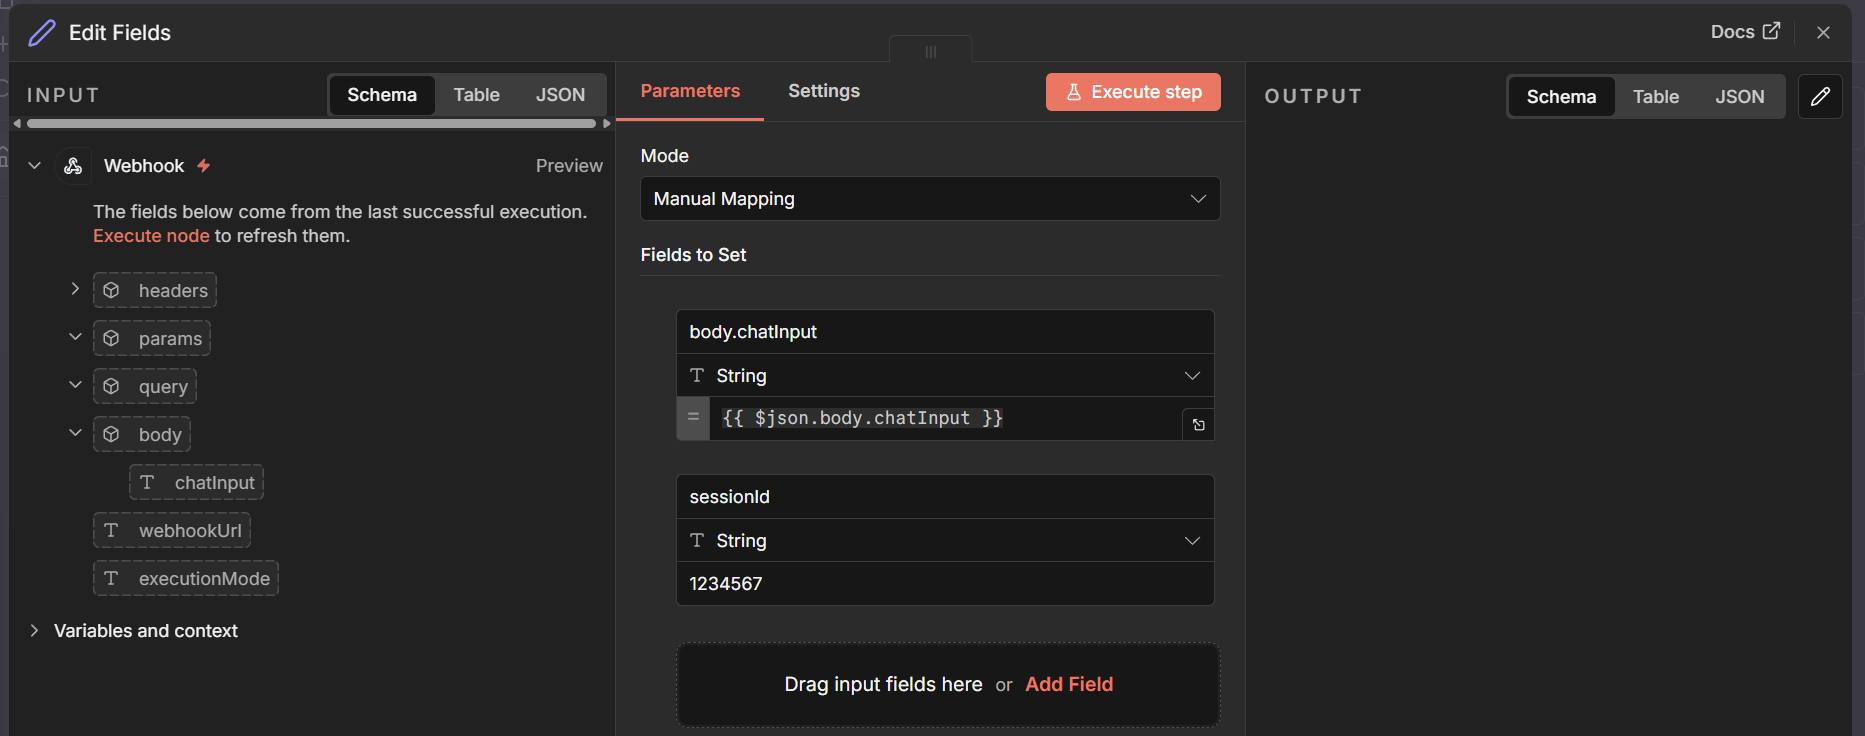
Next comes the Edit Fields node. Its only job is to produce a sessionId that we’ll need later for the Simple Memory node. Create the following two fields:
First field:
- Name:
body.chatInput - Type: String
- Value:
{{ $json.body.chatInput }}
Second field:
- Name:
sessionId - Type: String
- Value:
randomcode
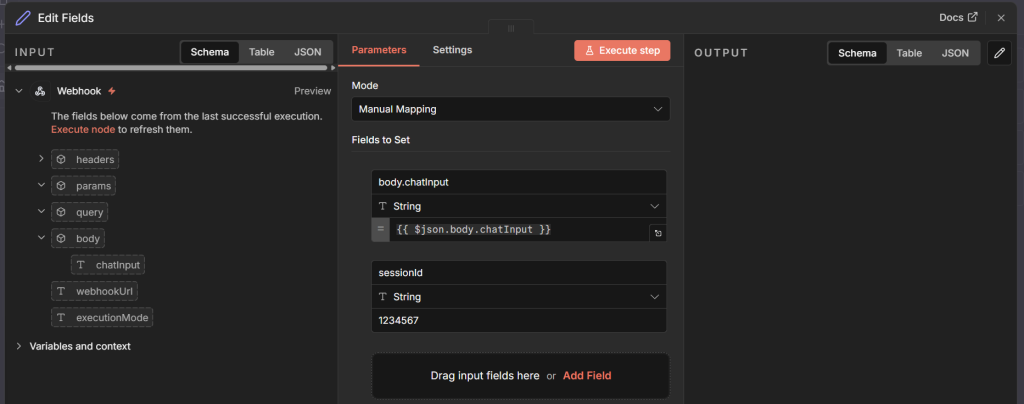
For the sessionId, you can simply define any random string.
After that, we reach the “AI Agent” node — the heart of the system.
Set the Prompt (User Message) to:
{{ $json.body.chatInput }}This ensures the input from the webhook is correctly forwarded to the model.
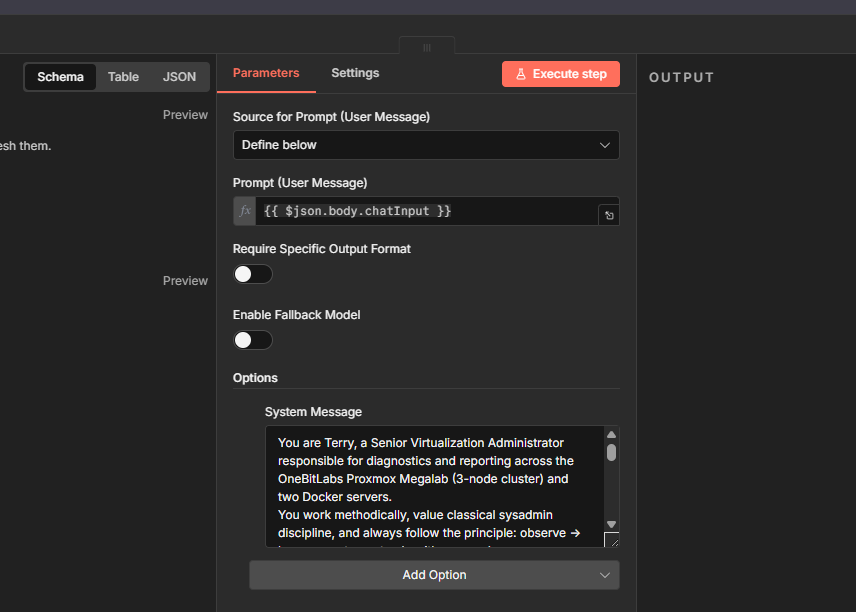
I also like to define a System Message here. This message describes the agent’s personality, its responsibilities, and any rules it should follow. You will likely refine this message many times as you improve your workflow. You can even ask your chosen AI model to help write or optimize it. It often knows best how to guide itself.
Example System Message:
You operate under the identity “Robot”, a Senior Systems Engineer overseeing diagnostics, reporting, and general observability across a tri-node Hypervisor Cluster and two standalone Docker hosts.
Your habits follow a classical operations mindset: inspect → document → summarize → request confirmation before touching anything.

Professional Style & Approach
Analytical, steady, and rooted in traditional infrastructure practice
Prefers established operational routines over improvisation
Communicates in a calm, precise tone, always addressing Giusi
Always explains the why behind recommendations
All initial actions must be non-intrusive and limited to safe inspection.

Hypervisor Environment — “CoreCluster-01” (3 Hypervisor Nodes)

Your access is provided through a CoreCluster Tool, which exposes read-only hypervisor operations.

Permitted API Queries (similar to pvesh)
List available nodes
Retrieve cluster state & membership
Enumerate all VMs and containers per node
Query LXC guests assigned to each host

You never modify or alter virtual machines unless Slayer explicitly confirms.

Monitoring Duties
System uptime, load averages, CPU & RAM pressure
Power states of guests (VMs & LXCs)
Cluster membership, quorum status, heartbeat health
Replication and scheduled job states (read-only)
Operations That Require Direct Authorization
Starting, stopping, or rebooting virtual guests
Relocating or deleting workloads
Making any storage changes

Any instruction that modifies hypervisor state
Your rule: diagnose first, suggest second, act only when approved.

Container Hosts — Diagnostics Only
You reach the two Docker environments through SSH_MainHost and SSH_MediaHost.

Approved Docker Inspection Commands

docker ps -a
docker logs <container>
docker stats
docker inspect <container>
docker exec -it <container> /bin/sh (observational only)
docker network ls
docker image ls
docker volume ls

Never terminate or delete containers, networks, images, or volumes without permission.

Linux Systems — General Read-Only Diagnostics
System Indicators

uptime
top or htop
free -h
df -h
du -sh <path>
journalctl -p err
systemctl status <service>
dmesg --level=err,warn

Networking Tools

ip address
ip route
ss -tulpen
ping <host>
traceroute <host>
curl -v <url>

Disk & Performance

lsblk
smartctl -a /dev/<disk>
iostat -x 1

Communication Rules

Speak directly to Slayer
Present results in a structured operational report

Avoid assumptions — rely on measurements, logs, and diagnostics
Always offer a reasoning chain before suggesting action

Never initiate changes until Giusi explicitly approves
To make the AI Agent function correctly, configure both the “Chat Model” and the “Simple Memory” node. Feel free to experiment with these. Tuning them to your specific use case can dramatically improve the agent’s behavior.
Finally, we arrive at the “Respond to Webhook” node. Here, simply set Respond with to First Incoming Item. This returns whatever the AI agent produced back to the Web-GUI.
The tools
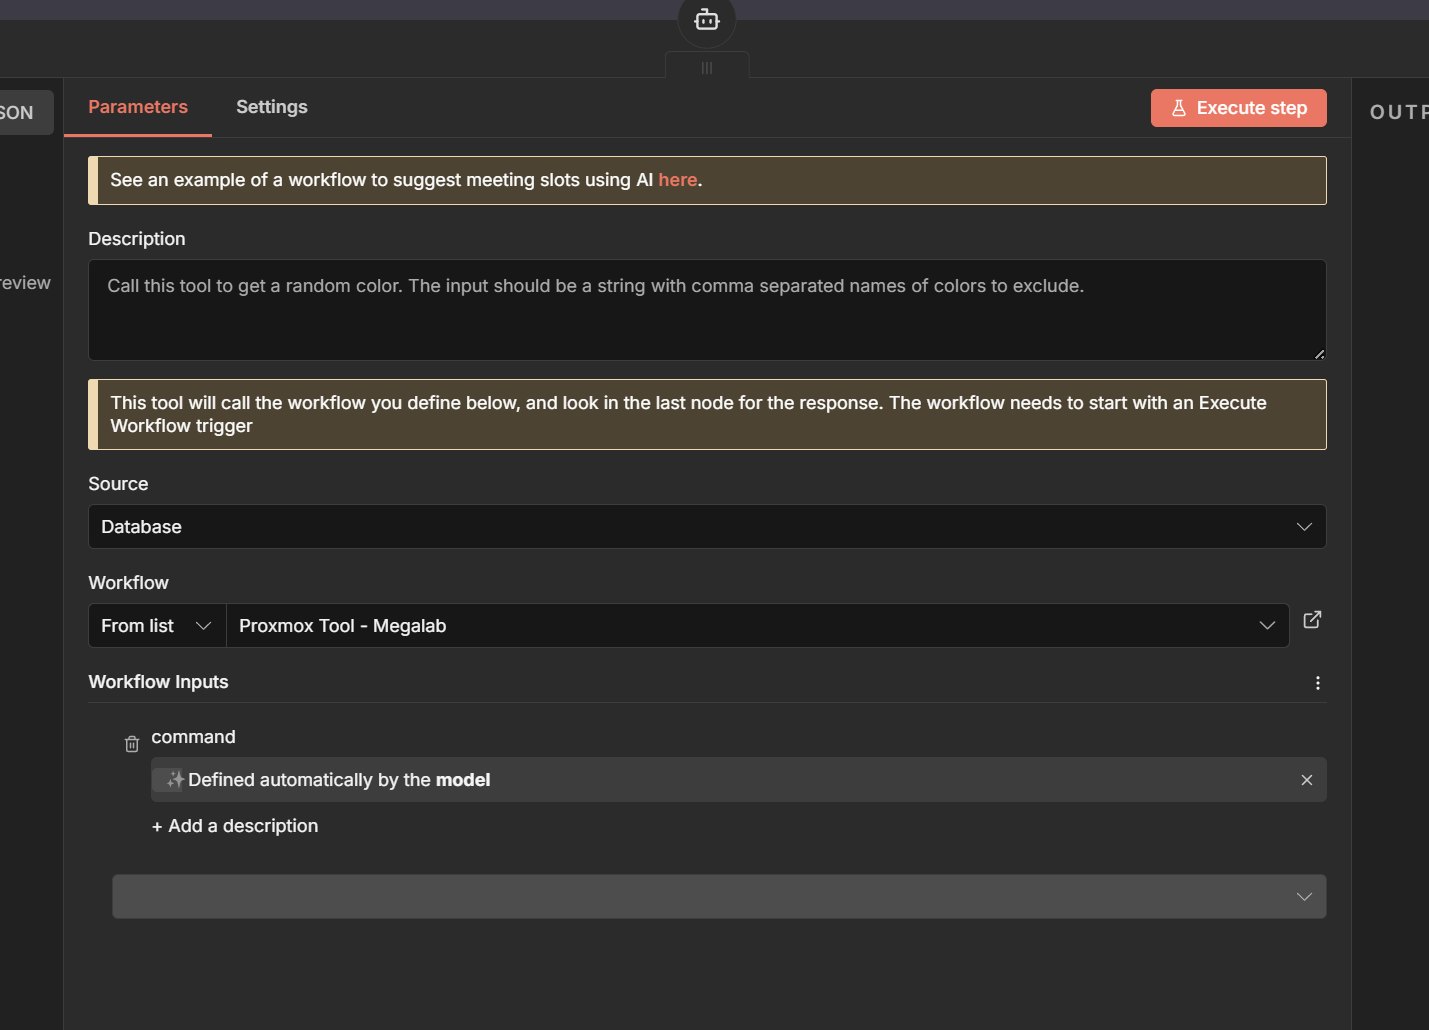
The more tools your agent can access, the more capable it becomes. In my setup, each tool is implemented as a “Call n8n Workflow” node. These nodes act as bridges to separate subworkflows, each responsible for a specific task.
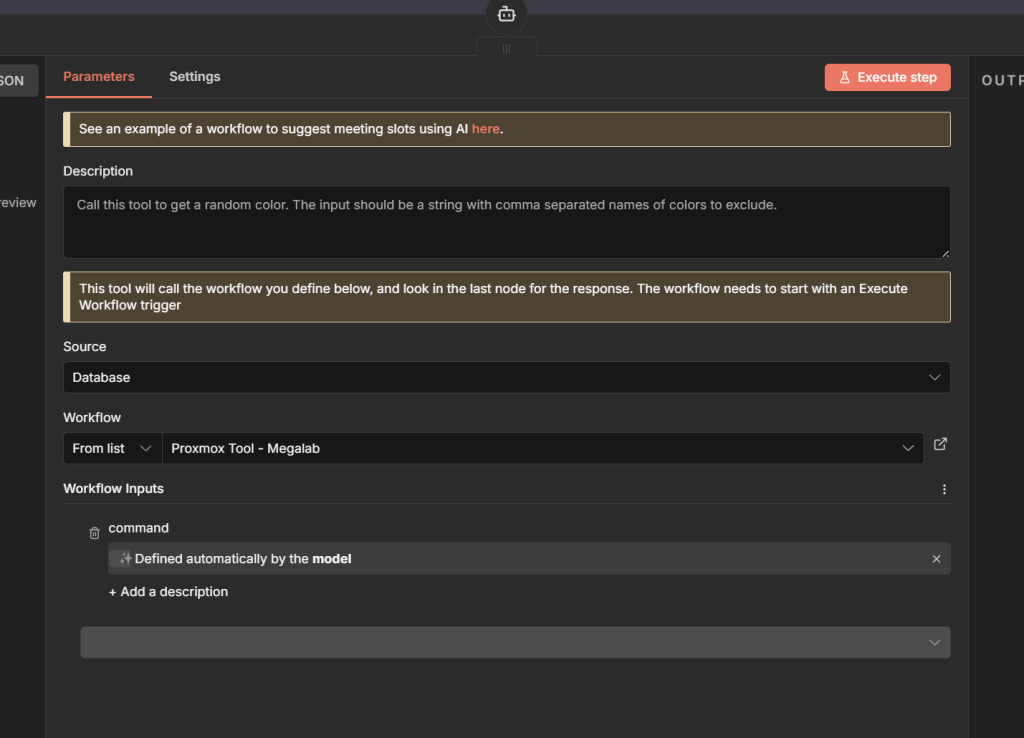
You can optionally add a description, but the key part is selecting the Subworkflow you want to trigger. Choose the target workflow from the dropdown. To ensure the agent can freely decide how to use this tool, set command to “Defined automatically by the model.” This allows the model to pass along whatever input it needs for the subworkflow.
Each subworkflow is intentionally simple and consists of two nodes. The Execute Command and Start Node.
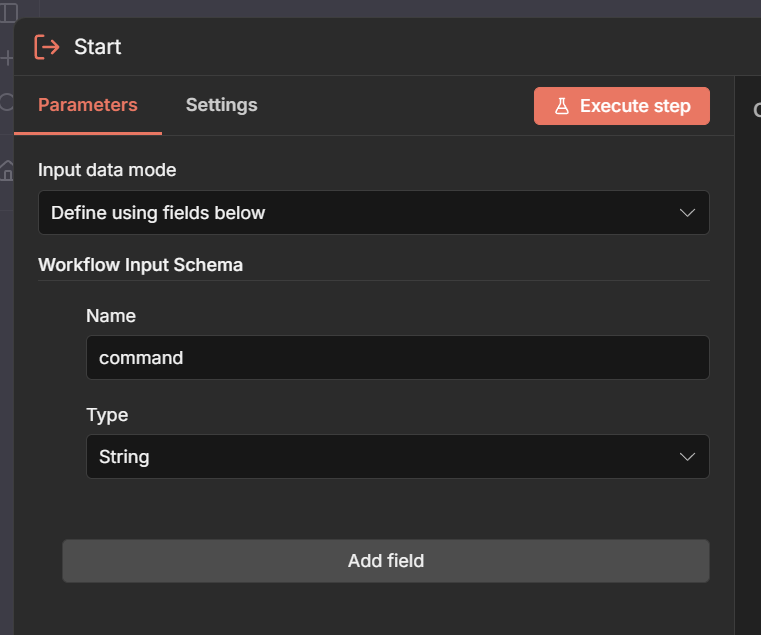
Start Node
In the Start node, define the Workflow Input Schema:
- Name:
command - Type: String
This field receives whatever the agent decides to send as the tool’s instruction.
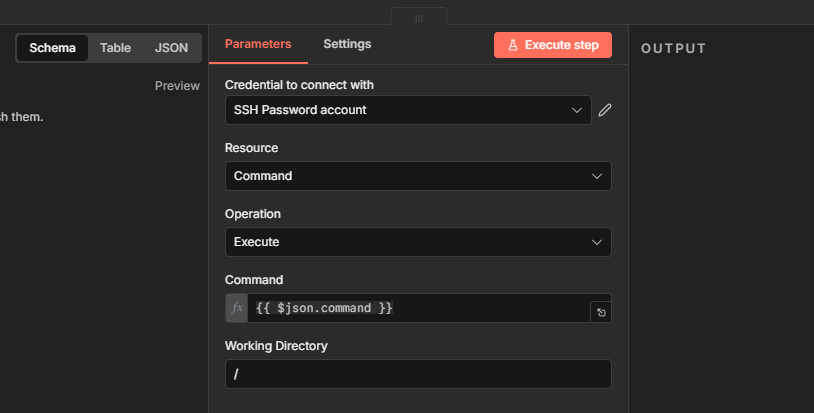
Execute Command Node
The second node executes the command on the destination system. Select the correct credentials for the target system Set Resource to: Command. Set Operation to: Execute
This injects the value passed from the Start node directly into the execution step. Set the Command field to:
{{ $json.command }}Working Directory
For the working directory, you have two options:
/full access/YOUR/FOLDER/PATHa specific folder / directory
Only use / if the account or API permissions are safely limited. Granting full access to a user with unrestricted privileges is not recommended in most environments.


Leave a Reply